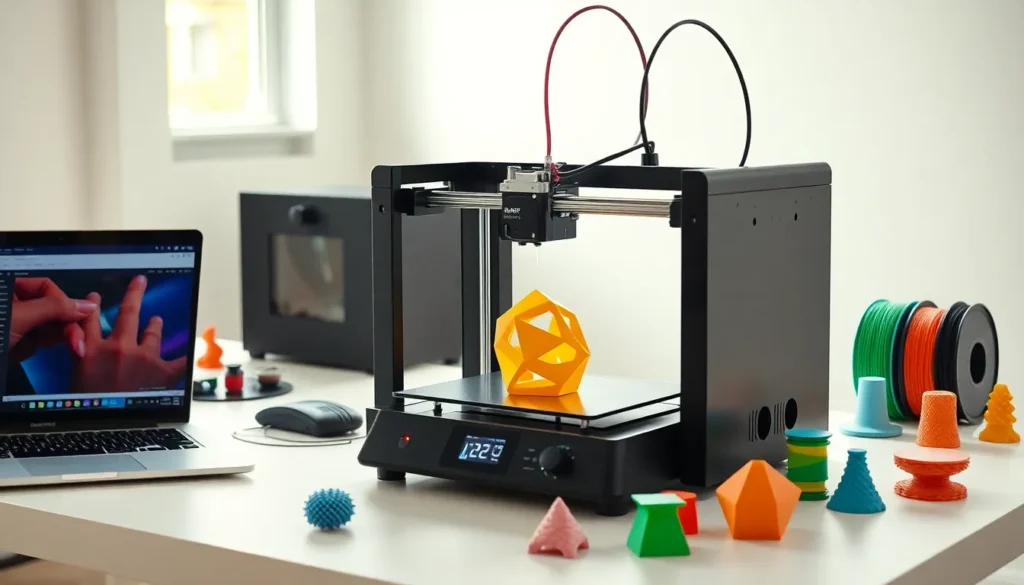
Learning how to 3D print opens up a world of creative possibilities. From custom phone cases to replacement parts, 3D printing transforms digital designs into physical objects. This technology has become accessible to hobbyists, educators, and small business owners alike. The process involves layering material to build three-dimensional objects from digital files. Beginners often feel uncertain about where to start. This guide breaks down the essentials: understanding the technology, selecting equipment, choosing materials, preparing models, and executing prints successfully. By the end, readers will have a clear roadmap to begin their 3D printing journey.
Table of Contents
ToggleKey Takeaways
- Learning how to 3D print starts with understanding the two main technologies: FDM (Fused Deposition Modeling) for beginners and SLA (Stereolithography) for finer details.
- Entry-level FDM printers start around $200 and offer features like heated beds and auto-leveling to help reduce failed prints.
- PLA filament is the best starting material for beginners due to its low printing temperature, minimal odor, and ease of use.
- Slicing software converts 3D models into printable instructions—master settings like layer height, infill percentage, and print speed to improve results.
- Always level your print bed and watch the first layer closely, as proper first-layer adhesion is critical to successful 3D printing.
- Store filament in sealed containers with desiccant to prevent moisture damage and ensure consistent print quality.
Understanding 3D Printing Technology
3D printing, also called additive manufacturing, builds objects layer by layer. A printer reads a digital file and deposits material according to the design specifications. This differs from traditional manufacturing, which cuts away material from a solid block.
The most common type for beginners is Fused Deposition Modeling (FDM). FDM printers heat plastic filament and extrude it through a nozzle. The nozzle moves along X, Y, and Z axes to create each layer. Layers stack on top of each other until the object is complete.
Stereolithography (SLA) represents another popular method. SLA printers use ultraviolet light to cure liquid resin into solid plastic. This technique produces smoother surfaces and finer details than FDM. But, SLA printers cost more and require additional post-processing.
Understanding how to 3D print starts with grasping these core concepts. The printer receives instructions from slicing software, which converts 3D models into printable layers. Each layer might be 0.1 to 0.3 millimeters thick. Thinner layers create smoother finishes but increase print time.
Choosing The Right 3D Printer For Your Needs
Selecting a 3D printer depends on budget, intended use, and technical comfort level. Entry-level FDM printers start around $200. These machines work well for learning how to 3D print basic objects like toys, household items, and simple prototypes.
Build volume matters significantly. This specification indicates the maximum size of objects the printer can create. A typical beginner printer offers a build volume of 220 x 220 x 250 millimeters. Larger projects require machines with bigger print beds.
Key Features To Consider
Heated bed: Prevents warping by keeping the bottom layers warm during printing. Most quality printers include this feature.
Auto-leveling: Automatically adjusts the print bed for optimal first-layer adhesion. This saves time and reduces failed prints.
Direct drive vs. Bowden extruder: Direct drive systems handle flexible filaments better. Bowden setups allow faster print speeds with standard materials.
Popular beginner-friendly options include the Creality Ender 3 series and Prusa Mini. These printers balance affordability with reliable performance. Research user reviews and community support before purchasing. A strong user community helps troubleshoot problems when learning how to 3D print.
Essential Materials And Filaments
Filament choice affects print quality, strength, and appearance. PLA (Polylactic Acid) remains the most popular material for beginners learning how to 3D print. It’s made from renewable resources like cornstarch, prints at lower temperatures, and produces minimal odor.
PLA works well for decorative items, prototypes, and low-stress applications. It prints at 190-220°C and doesn’t require a heated bed, though one helps. The material comes in countless colors and specialty finishes.
ABS (Acrylonitrile Butadiene Styrene) offers greater durability and heat resistance. This plastic requires higher temperatures (220-250°C) and a heated bed. ABS tends to warp without proper enclosure and ventilation. It suits functional parts that experience mechanical stress.
PETG combines PLA’s ease of printing with improved strength and flexibility. Many users consider it the best all-around filament after mastering basic techniques. PETG resists moisture and chemicals better than PLA.
Filament Storage Tips
Moisture damages most filaments. Store spools in sealed containers with desiccant packets. Humid environments cause filament to absorb water, leading to bubbling and poor print quality. Proper storage extends filament life and ensures consistent results when learning how to 3D print.
Preparing Your 3D Model For Printing
Every 3D print starts with a digital model. Beginners can download ready-made designs from repositories like Thingiverse, Printables, or MyMiniFactory. These sites offer thousands of free models ranging from practical tools to artistic sculptures.
Creating custom models requires CAD (Computer-Aided Design) software. TinkerCAD provides a free, browser-based option perfect for beginners. Fusion 360 offers professional-grade features with a free hobbyist license. Blender works well for organic shapes and artistic designs.
Once a model is ready, slicing software prepares it for printing. Slicers convert 3D models into G-code, instructions the printer follows. Popular slicers include Cura, PrusaSlicer, and Simplify3D.
Critical Slicer Settings
Layer height: Determines surface smoothness. 0.2mm balances quality and speed for most prints.
Infill percentage: Controls internal density. 20% suits most decorative items. Functional parts may need 40-60%.
Print speed: Faster speeds reduce time but may sacrifice quality. 50-60mm/s works for most beginners.
Supports: Enable these for overhanging sections greater than 45 degrees. The slicer generates temporary structures that break away after printing.
Understanding how to 3D print effectively requires mastering these slicer settings. Small adjustments dramatically impact results.
Step-By-Step Printing Process
With equipment ready and a sliced model prepared, printing can begin. Follow these steps for successful results:
Step 1: Level the bed. A level print bed ensures proper first-layer adhesion. Most printers include a manual leveling process using paper as a gauge. The nozzle should slightly drag against the paper at each corner.
Step 2: Load filament. Heat the nozzle to the appropriate temperature for the material. Feed filament through the extruder until plastic flows from the nozzle.
Step 3: Apply bed adhesion. Clean the print surface with isopropyl alcohol. Some users apply glue stick or hairspray for extra grip. PEI sheets and textured glass beds often don’t need adhesives.
Step 4: Start the print. Transfer the G-code file via SD card or USB connection. Select the file and begin printing. Watch the first few layers carefully.
Step 5: Monitor progress. The first layer is critical. Look for even lines without gaps or bunching. If problems appear, stop and adjust bed level or temperature.
Step 6: Remove the print. Wait for the bed to cool. Prints release more easily at room temperature. Use a spatula for stubborn pieces.
Learning how to 3D print involves patience and practice. First attempts rarely achieve perfection. Each print teaches something new about settings and techniques.