This 3D printing guide covers everything beginners need to start creating physical objects from digital designs. 3D printing has moved from industrial labs to home desks, and the technology is more accessible than ever. Whether someone wants to print replacement parts, custom gadgets, or artistic creations, understanding the basics makes all the difference.
This guide walks through how 3D printing works, the best printer types for beginners, essential materials, setup steps, and troubleshooting tips. By the end, readers will have the knowledge to confidently start their first print.
Table of Contents
ToggleKey Takeaways
- This 3D printing guide helps beginners understand how printers build objects layer by layer from digital designs using G-code instructions.
- FDM printers are the best starting point for beginners due to their affordability, safe materials, and gentler learning curve.
- PLA filament is ideal for first-time users because it prints at lower temperatures, doesn’t warp easily, and produces minimal odor.
- Proper bed leveling is critical for successful prints—if the nozzle distance is wrong, prints either won’t stick or filament won’t flow properly.
- Store filament in airtight containers with desiccant packets to prevent moisture absorption and printing problems.
- Common issues like bed adhesion failures, stringing, and warping can usually be fixed by adjusting temperature, retraction settings, or adding a brim.
How 3D Printing Works
3D printing builds objects layer by layer from digital files. The process starts with a 3D model, typically created in CAD software or downloaded from online repositories like Thingiverse or Printables.
A slicer program then converts this model into G-code, instructions that tell the printer exactly where to move and when to deposit material. Think of G-code as a recipe the printer follows step by step.
The most common method is Fused Deposition Modeling (FDM). An FDM printer heats plastic filament until it melts, then pushes it through a nozzle onto a build plate. The nozzle moves in precise patterns, laying down thin layers that stack to form the final object. Each layer is typically 0.1 to 0.3 millimeters thick.
Resin printers use a different approach called Stereolithography (SLA) or MSLA. These machines cure liquid resin with UV light, hardening it layer by layer. Resin prints offer finer detail but require more post-processing and safety precautions.
Both methods follow the same core principle: additive manufacturing. Instead of cutting material away like traditional machining, 3D printing adds material only where needed. This approach reduces waste and enables shapes that would be impossible to manufacture otherwise.
Types of 3D Printers for Beginners and Hobbyists
Choosing the right 3D printer depends on goals, budget, and patience level. Here’s a breakdown of the main options.
FDM Printers
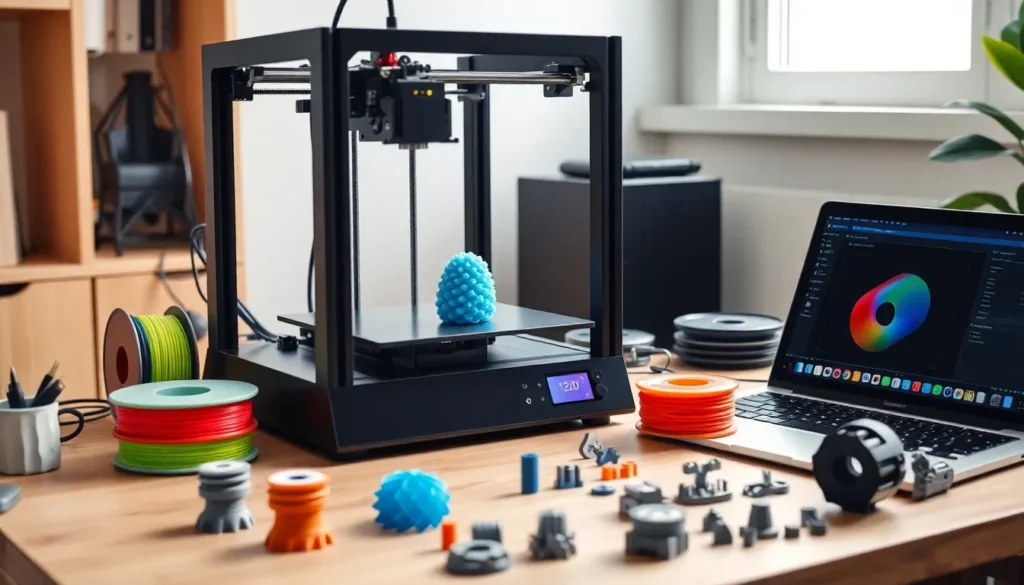
FDM printers dominate the beginner market for good reason. They’re affordable, use safe materials, and produce functional parts. Popular entry-level models include the Creality Ender 3 series and Anycubic Kobra. Prices range from $150 to $500 for quality beginner machines.
FDM printers work best for mechanical parts, prototypes, and larger objects. The layer lines are visible on finished prints, but sanding and painting can improve appearance.
Resin Printers
Resin printers excel at detail work. Miniatures, jewelry, and dental models look stunning with resin. The Anycubic Photon and Elegoo Mars series offer excellent quality under $300.
But, resin printing requires ventilation, gloves, and careful handling. Uncured resin is toxic and messy. Post-processing involves washing prints in isopropyl alcohol and curing them under UV light.
Which Should Beginners Choose?
Most beginners should start with an FDM printer. The learning curve is gentler, materials are cheaper, and mistakes are less costly. Once comfortable with 3D printing basics, adding a resin printer for detailed projects makes sense.
Essential Materials and Filaments
Materials make or break a 3D print. Using the right filament for each project prevents failed prints and frustration.
PLA (Polylactic Acid)
PLA is the go-to filament for beginners. It prints at lower temperatures (190-220°C), doesn’t warp easily, and comes in countless colors. PLA is biodegradable and produces minimal odor. The downside? It softens around 60°C, so it’s not ideal for items exposed to heat.
PETG
PETG offers better durability and heat resistance than PLA. It prints at 230-250°C and handles moisture and chemicals well. PETG is a solid choice for functional parts like phone cases, tool holders, and outdoor items.
ABS
ABS is strong and heat-resistant but tricky to print. It requires an enclosed printer and heated bed to prevent warping. The fumes aren’t pleasant either. Most beginners skip ABS until they’ve mastered easier materials.
TPU
TPU is flexible, making it perfect for phone cases, gaskets, and wearables. Printing TPU requires slower speeds and a direct-drive extruder for best results.
Storage Tips
Filament absorbs moisture from the air, which causes printing problems. Store spools in airtight containers with desiccant packets. Some makers use heated dry boxes during printing for best results.
Setting Up Your First 3D Print
The first print is exciting, and a little nerve-wracking. Following these steps increases the chances of success.
Step 1: Assemble and Level
Most budget printers arrive partially assembled. Follow the manufacturer’s instructions carefully. Bed leveling is critical, if the nozzle is too far from the bed, prints won’t stick. Too close, and the filament can’t flow properly. Many newer printers include auto-leveling features that simplify this process.
Step 2: Load Filament
Heat the nozzle to the recommended temperature for PLA (usually 200°C). Insert the filament into the extruder until it comes out of the nozzle smoothly. Wipe away any excess.
Step 3: Choose a Test Print
Start with something simple. A calibration cube or benchy boat tests basic printer performance without wasting hours. These models reveal issues with bed adhesion, layer quality, and dimensional accuracy.
Step 4: Slice Your Model
Download slicing software like Cura, PrusaSlicer, or Bambu Studio. Import your model, select your printer and filament profiles, and adjust settings. For first prints, stick with default settings, they’re tested to work.
Step 5: Print and Monitor
Transfer the G-code to your printer via SD card, USB, or Wi-Fi. Start the print and watch the first few layers. If adhesion looks good and layers are clean, the print will likely succeed. Don’t leave early prints completely unattended.
Common Troubleshooting Tips
Even experienced makers encounter problems. Knowing how to fix common issues saves time and filament.
Prints Won’t Stick to the Bed
This is the most common beginner problem. Solutions include:
- Releveling the bed (closer to the nozzle)
- Cleaning the bed with isopropyl alcohol
- Using a glue stick or hairspray for adhesion
- Increasing bed temperature by 5-10°C
Stringing and Oozing
Thin strings between parts indicate retraction issues. Increase retraction distance and speed in the slicer. Lowering print temperature by 5°C can also help.
Layer Separation
Weak layer bonding often means the nozzle temperature is too low. Increase temperature in 5°C increments until layers fuse properly. Printing too fast can cause this issue too.
Warping
Corners lifting off the bed plague larger prints. Use a brim or raft for better adhesion. An enclosure helps with materials like ABS. Reducing cooling fan speed for the first few layers can prevent warping.
Clogs
A clogged nozzle stops filament flow. Heat the nozzle and push filament through manually. If that fails, a cold pull (heating then cooling while pulling filament) often clears blockages. Keep spare nozzles on hand, they’re cheap and easy to replace.