3D printing tips can transform frustrating failed prints into consistent, high-quality results. Whether someone just unboxed their first printer or has been printing for years, small adjustments often make the biggest difference. A calibrated machine, correct settings, and the right materials work together to produce clean, accurate prints every time.
This guide covers practical techniques that improve print quality at every stage. From preparing the printer to troubleshooting common issues, these 3D printing tips help users get more from their machines without expensive upgrades or complicated modifications.
Table of Contents
ToggleKey Takeaways
- Proper bed leveling and nozzle calibration prevent most first-layer failures and improve overall print quality.
- Slicer settings like layer height, print speed, and retraction directly impact the success of your 3D prints—start with balanced defaults and adjust based on results.
- Choose the right filament for your project: PLA for easy printing, PETG for durability, ABS for heat resistance, and TPU for flexibility.
- Store filament in sealed containers with desiccant to prevent moisture damage that causes bubbling and weak layers.
- Troubleshoot common issues like stringing, warping, and under-extrusion by adjusting temperature, retraction, and flow settings systematically.
- These 3D printing tips help users achieve consistent, high-quality results without expensive upgrades or complicated modifications.
Prepare Your Printer for Optimal Performance
A well-prepared printer produces better results than an expensive machine that’s poorly maintained. Before starting any print, users should check a few key areas.
Level the Bed Properly
Bed leveling affects every print. An uneven bed causes adhesion problems, warping, and failed first layers. Most printers include manual leveling with thumb screws, while some offer automatic bed leveling sensors. Either way, users should verify the nozzle height at multiple points across the bed.
The paper test works well for manual leveling. Slide a piece of standard paper between the nozzle and bed at each corner. The paper should drag slightly but still move freely. Repeat this process until all corners feel consistent.
Check Belt Tension
Loose belts create layer shifting and dimensional inaccuracies. The X and Y axis belts should feel firm when pressed, like a guitar string with some give. Too tight causes motor strain: too loose produces sloppy movements.
Clean the Nozzle
Partial clogs reduce extrusion and create inconsistent lines. Cold pulls (also called atomic pulls) clear debris effectively. Heat the nozzle to printing temperature, push filament through, then cool to about 90°C and pull the filament out quickly. The debris sticks to the filament tip.
These preparation steps take minutes but save hours of troubleshooting later. Consistent 3D printing tips always start with a properly maintained machine.
Dial In Your Slicer Settings
Slicer software converts 3D models into printer instructions. The settings chosen here directly impact print quality, strength, and speed.
Layer Height
Layer height determines resolution and print time. Smaller layers (0.1mm) produce smoother surfaces but take longer. Larger layers (0.3mm) print faster with visible layer lines. For most projects, 0.2mm offers a good balance between quality and speed.
Print Speed
Slower speeds generally improve quality. Start around 50mm/s for standard prints. Detailed models or overhangs benefit from speeds closer to 30-40mm/s. Users can increase speed for simple shapes without fine details.
Temperature Settings
Every filament has an ideal temperature range. PLA typically prints between 190-220°C, while PETG needs 230-250°C. Start at the middle of the recommended range and adjust based on results. Too hot causes stringing and oozing. Too cold leads to poor layer adhesion.
Retraction Settings
Retraction pulls filament back during travel moves to prevent stringing. A retraction distance of 1-2mm works for direct drive extruders, while Bowden setups often need 4-7mm. Retraction speed around 25-45mm/s handles most situations.
Experimenting with these 3D printing tips in the slicer helps users find the perfect balance for their specific printer and materials.
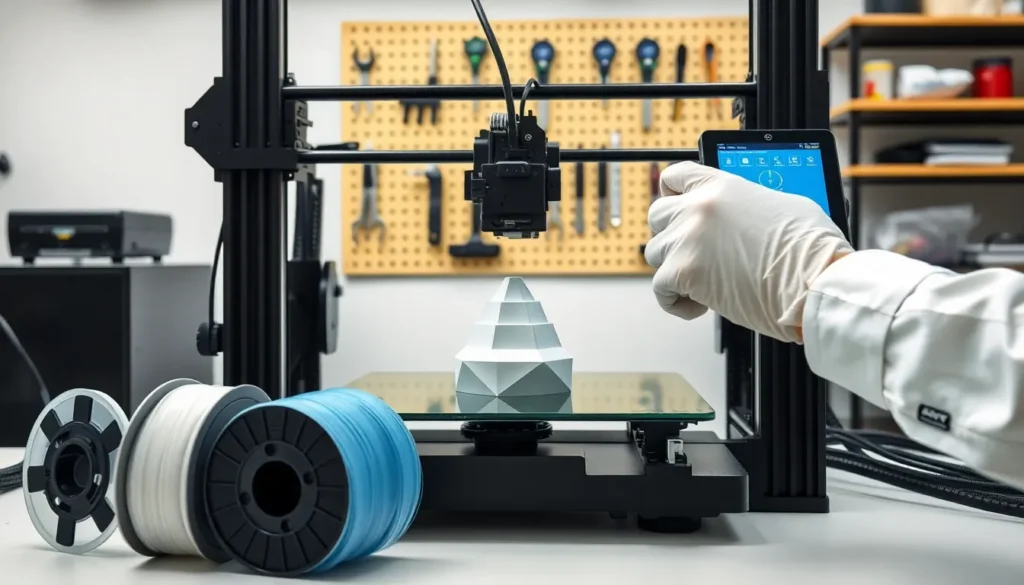
Choose the Right Filament for Your Project
Material selection affects print success as much as settings do. Different filaments have different strengths, weaknesses, and requirements.
PLA (Polylactic Acid)
PLA remains the most popular filament for good reason. It prints easily at low temperatures, doesn’t require a heated bed (though one helps), and produces minimal warping. PLA works great for prototypes, decorative items, and projects that won’t face heat or stress.
PETG
PETG offers better durability and flexibility than PLA. It handles moderate heat and resists impact well. But, PETG strings more easily and requires higher temperatures. Users should dry PETG before printing for best results.
ABS
ABS provides excellent strength and heat resistance but demands more from the printer. It requires high bed temperatures (90-110°C), an enclosure to prevent warping, and good ventilation due to fumes. ABS suits functional parts that need durability.
TPU
Flexible TPU creates rubber-like prints for phone cases, gaskets, or shock absorbers. Direct drive extruders handle TPU much better than Bowden systems. Slow print speeds (20-30mm/s) prevent feeding issues.
Storing filament properly matters too. Moisture degrades most materials and causes bubbling, popping, and weak layers. Sealed containers with desiccant keep filament dry between uses.
Improve Bed Adhesion and First Layer Quality
The first layer determines whether a print succeeds or fails. Strong bed adhesion keeps parts stuck during printing while allowing easy removal afterward.
Bed Surface Options
Different surfaces work better with different materials. Glass beds provide a smooth bottom finish and clean easily. PEI sheets offer excellent adhesion without additional products. BuildTak and similar textured surfaces grip well but may wear over time.
Adhesion Helpers
Sometimes the bed surface needs assistance. Glue sticks provide reliable adhesion for most materials. Hairspray (the cheap, unscented kind) creates a thin sticky layer. Blue painter’s tape works well for PLA on unheated beds.
First Layer Settings
The first layer benefits from special treatment in the slicer. Increasing first layer width to 120% improves adhesion. Slowing the first layer to 50% of normal speed gives material time to bond properly. A slightly higher first layer temperature (5-10°C above normal) also helps.
Nozzle Height Matters
The nozzle should sit close enough to squish the first layer slightly but not so close that it scrapes the bed. A properly calibrated first layer looks flat on top with slight ridges visible. Too high creates rounded lines that don’t stick. Too low produces thin, transparent lines or no extrusion at all.
These 3D printing tips for first layers prevent the most common failure point in FDM printing.
Troubleshoot Common Printing Problems
Even with proper preparation, problems happen. Knowing how to identify and fix issues saves time and filament.
Stringing
Thin strings between parts indicate oozing during travel moves. Increase retraction distance or speed. Lower print temperature slightly. Enable “combing” in the slicer to keep travel moves within the model when possible.
Warping
Corners lifting from the bed happen when material cools unevenly. Increase bed temperature. Add a brim or raft for more adhesion area. Use an enclosure to maintain consistent ambient temperature. Draft shields in the slicer also reduce warping.
Layer Separation
Poor bonding between layers creates weak prints that split apart. Increase print temperature to improve fusion. Reduce cooling fan speed, especially for ABS and PETG. Check for partial nozzle clogs that reduce extrusion.
Under-Extrusion
Thin, gappy layers with visible infill suggest too little material. Calibrate the extruder steps per millimeter. Check for clogs or worn PTFE tubing. Increase flow rate in 5% increments until lines look solid.
Over-Extrusion
Blobby surfaces and rough details indicate too much material. Decrease flow rate. Verify filament diameter matches the slicer setting (most filament measures 1.75mm, but cheap filament varies).
Systematic troubleshooting using these 3D printing tips identifies root causes rather than masking symptoms with workarounds.